The first prosthesis
My parents have been aching about weight training for years and have been going to the gym regularly for over 20 years. When, at the age of 12, I was looking for a new sport and I had slight tension in my back, they came up with the idea of talking to the physiotherapist in their fitness center. Together we decided that I would start with very light strength training to balance and stabilize my back muscles. Now I saw a prosthesis as a useful tool and we had a prosthesis made for me.
A plaster cast of the residual limb is made at the beginning of the fabrication of a prosthesis. With the grip of the technician, it is already determined which bone structures the prosthesis will later adhere to. In my case, this was the elbow joint. Since the finished prosthesis costs several thousand Swiss francs, a mold of this plaster cast is first made of plastic and provisionally prepared in order to test it and check for pressure points (see picture). I have also tested a harness that is placed behind the back around the opposite shoulder. If you then stretch out with the prosthesis, the harness pulls on the hook and opens it. Due to the back training, which includes many stretching exercises, this system proved to be very unsuitable for strength training in my opinion, which is why I still open and close the prosthesis manually today.

- I was about 12 years old: For the first time in training with the prototype
Since I had a few pressure points, the plastic mold was treated with a heating hairdryer to relieve the pressure points. From this mold, the final silicone impression was made, which can then be put on like a glove. The forearm (shaft) is then built up around this silicone socket. It consists mostly of fiberglass or carbon, in my case, it was fiberglass, into which a „metal joint“ was cast, which allows the rotation of the hook by 360°.


- Metal hook, which is particularly suitable for pulling movements
For more than two years I trained different exercises like different variations of lat pull-downs, supported chin-ups and rowing on the machine. Both my posture and tension improved significantly.
My current prosthesis
After a break of three years, I finally started strength training again. In the beginning, the prosthesis was too tight because I had grown naturally during this time and also gained weight. That’s why I applied for a new prosthesis. After about a year, the new prosthesis was finally approved. This year I focused more on weight loss and was successful with it, but I was still able to increase the weights used to a point where it became difficult because I had lost so much weight that the prosthesis was now too big 🙂 In the meantime I was already really crazy for the sport and waited impatiently for the new prosthesis to finally be able to improve further.

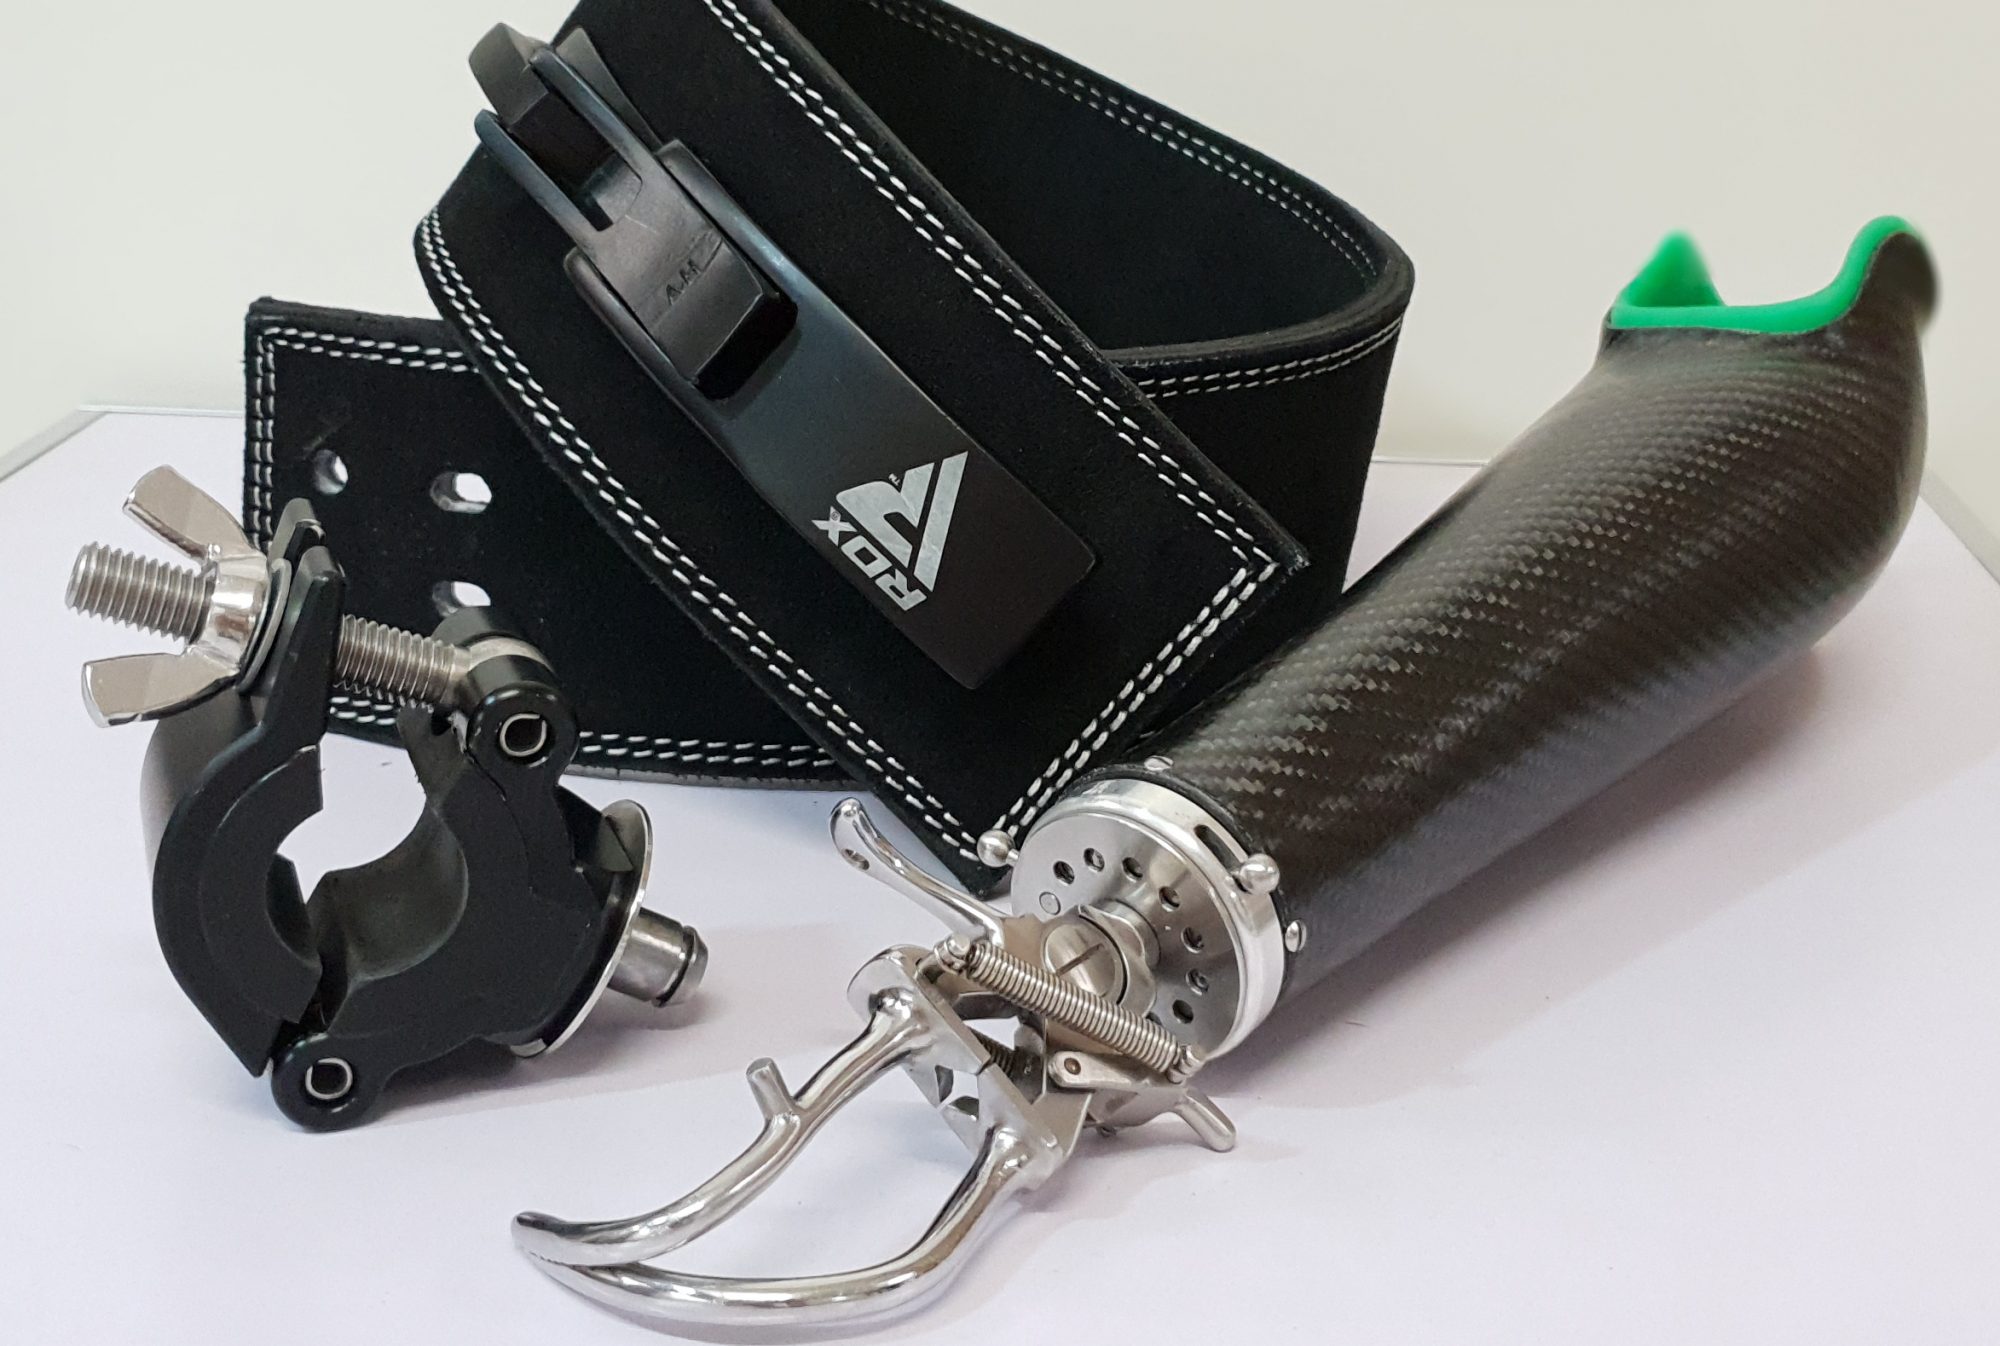
- My new prosthesis made with carbon fiber
I chose a carbon shaft because it would give me more stability. I also wanted the prosthesis to fit tightly and slightly compress my residual limb. However, the slight compression of the residual limb is only recommended for insensitive residual limbs, as it can become very narrow, especially if the residual limb is pumped up with blood due to the strength training. Another important point for me was the angle I wanted to achieve with the new prosthesis. For some exercises, such as bench pressing, an angle of less than 90° was very important in order to be able to perform a good execution. But also 180° should be easy to reach in my case because I planned to include deadlifts in my training plan. In case of doubt, however, I would always go for an angle of less than 90° first, since, in my opinion, the other ratio of 180° is less important.

- Silicone socket in green 🙂
As with my first prosthesis, the inner socket is made of silicone. The silicone is very durable and does not cause skin irritation when cleaned after use.


Besides the metal hook, I currently use the Black Iron Trainer, which I had imported from the US. The principle is relatively simple: With the wing screw on the thread, a weight or a barbell can be clamped and clamped. The lock can hold 200 kg, so it should last for a while 😉 Unfortunately, such a tool is regarded as a sports tool, which is why I had to pay the costs of far more than 1000 Swiss francs. I have only a little understanding for the health insurance such a utensil not to take over, which can be regarded nevertheless as prevention of back complaints and so the health insurance would cost in the future less. They prefer to pay Physio when back problems occur instead of supporting prevention in this way. . . But since strength training became so important to me, I paid this price without hesitation. The tool is very good and is always a companion of mine in the gym.

- Silicone sleeve
As further protection in pulling movements, I use simple silicone sleeves, which I partly pull over my upper arm and over the prosthesis to create a vacuum (see the picture of my old prosthesis). This vacuum withstands even the heaviest weights and makes me think more about the actual execution of the exercise. There would also be the option to have such a silicone sleeve made to fit exactly. These are then far more durable and fit even better. I might consider this variation soon, as I am currently performing many pulling movements.
